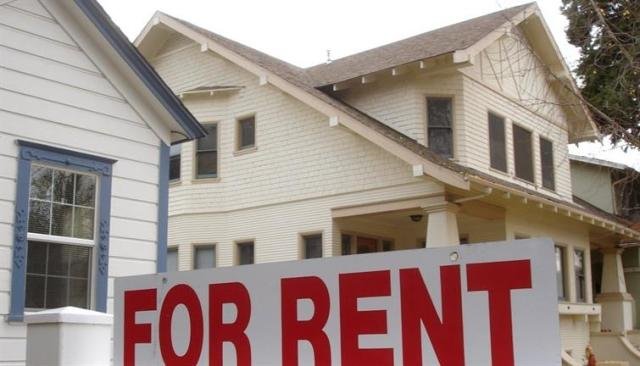
Your first day in a new home should be about excitement, not legal anxiety. However, with nearly 25% of US renters losing their security deposits to pre-existing damages, a “new beginning” can quickly become a thousand-dollar mistake. In fast-paced markets like Houston, a move in inspection checklist printable is your most powerful tool for financial protection.
At Hexa Property Management, we believe a “good lifestyle” starts with transparency. By documenting every detail from day one, we build a foundation of trust that protects both the resident and the home!
Why You Need a Move-In Inspection Checklist
In the United States, security deposit disputes are among the leading causes of legal conflict between landlords and tenants. A move-in checklist acts as your primary line of defense in these situations.
Protect Your Security Deposit
In most US states, your security deposit is equal to one or two months’ rent. This is a significant sum of money. Landlords are legally allowed to withhold these funds to cover repairs once you move out. However, they cannot charge you for pre-existing conditions. A documented checklist provides the “before” picture that proves you are not responsible for that crack in the tile or the stain on the carpet.
Legal Evidence in Small Claims Court
Should a dispute escalate, a signed, dated move in inspection checklist printable serves as powerful evidence in Small Claims Court. It transforms a “he-said, she-said” argument into a factual, written record. Judges in the US heavily favor documented evidence over verbal testimony.
Identifying Necessary Repairs Early
A thorough walkthrough helps you spot safety hazards or functional issues immediately. Whether it is a faulty smoke detector, a leaky pipe under the sink, or a broken window lock, reporting these early ensures your landlord is aware and can schedule repairs before they disrupt your life.
Normal Wear and Tear vs. Tenant Damage: Know the Difference
One of the biggest areas of confusion for US renters is the difference between “normal wear and tear” and “actual damage.” Knowing this distinction is vital for your inspection.
What is Normal Wear and Tear?
Landlords cannot deduct money for things that happen naturally over time.
- Faded Paint: Slight discoloration from sunlight.
- Worn Carpet: Thinning of carpet fibers in high-traffic areas.
- Loose Knobs: Door handles or cabinet pulls that become loose with regular use.
- Minor Scuffs: Small marks on wood floors that occur during normal living.
What is Considered Tenant Damage?
These are issues caused by negligence, accidents, or misuse.
- Holes in Walls: Large holes from mounting TVs or heavy shelving.
- Pet Stains: Urine stains or scratch marks on doors and baseboards.
- Broken Windows: Cracked glass or torn screens caused by the tenant.
- Burnt Countertops: Marks from hot pans or cigarette burns.
What to Look for in Your Move In Inspection Checklist Printable
To ensure you don’t miss a thing, follow this room-by-room guide. Use your move in inspection checklist printable to check off each item as you go.
Kitchen and Dining Areas
The kitchen is the most expensive room to repair in a rental property. Pay close attention to every appliance and plumbing fixture.
- Appliances: Turn on the stove burners, the oven, and the microwave. Check that the refrigerator and freezer reach the correct temperatures. Look for broken shelves or cracked drawers inside the fridge.
- Plumbing: Open the cabinet under the sink. Look for dampness, water stains, or active leaks. Test the garbage disposal for strange noises.
- Cabinets and Drawers: Open every single one. Check for smooth operation, broken hinges, and signs of pests (like droppings).
- Countertops: Run your hand along the surface. Note any deep scratches, chips, or burns. Check the sealant around the sink for mold or gaps.
Living and Bedrooms
These areas should be inspected for comfort, safety, and aesthetic condition.
- Flooring: Look for stains on the carpet, deep gouges in hardwood, or cracked tiles. Check the transition strips between rooms to ensure they aren’t tripping hazards.
- Walls and Ceilings: Document any nail holes, paint chips, or ceiling stains. Ceiling stains often indicate a leak from the floor above or the roof.
- Windows and Blinds: Open and close every window. Ensure the locks engage. Check the blinds or curtains for broken slats or frayed cords.
- Electrical Outlets: Use a small device or a circuit tester to ensure every outlet has power. Check for cracked outlet covers.
Bathroom and Plumbing
Moisture issues in the bathroom can lead to mold, which is a major health concern in many US rental markets.
- The Toilet: Flush every toilet. Ensure it doesn’t leak at the base and that the tank refills quietly and stops.
- Shower and Tub: Turn on the water to check pressure and temperature. Look for cracks in the fiberglass or missing grout in the tile. Check the drain speed.
- Ventilation: Turn on the exhaust fan. If there is no fan, ensure the window opens easily. Proper ventilation is key to preventing mildew.
- Vanity and Mirror: Check the mirror for “desilvering” (black spots) and ensure the sink drains properly without leaking into the cabinet below.
Exterior, Garage, and Additional Spaces
Don’t forget the areas outside the main living quarters.
- The Garage: Test the automatic garage door opener. Check for oil stains on the floor and ensure the “eye” sensors are working for safety.
- Patio or Balcony: Check for loose railings or rotted wood. Ensure the outdoor lights work.
- Yard and Landscaping: If you are responsible for yard work, note the condition of the grass and trees upon arrival.
- Laundry Room: If a washer and dryer are provided, run a quick cycle to ensure they don’t leak or shake excessively. Check the lint trap and dryer vent for fire hazards.
Safety Features and Utilities
This is the most critical section for your physical well-being.
- Detectors: Every rental must have functioning smoke detectors and carbon monoxide alarms. Press the “test” button on each.
- HVAC System: Turn on the AC and the heater, regardless of the season. Listen for banging noises. Check the air filter; if it’s filthy, ask the landlord for a replacement immediately.
- Lighting: Flip every switch in the house. Note any dead bulbs or flickering fixtures.
- Security: Ensure the front and back door deadbolts are secure. Check that the peephole is clear.
The Professional Standard: How to Use Your Checklist
Simply checking boxes is only half the battle. To make your move in inspection checklist printable a legally binding shield, follow these steps.
The Walkthrough Process
The best practice is to perform the walkthrough with your landlord or property manager present. This allows you to agree on the condition of the home in real-time. If they cannot attend, do the inspection alone before you move in your furniture. Once furniture is in, it can hide damages and complicate your claims later.
Advanced Photo and Video Documentation
A picture is worth a thousand words, and a video is worth even more.
- Timestamp Everything: Use a camera app that embeds the date and time directly onto the image.
- The “Wide to Close” Method: Take a wide-angle shot of the entire room, then zoom in on specific defects. This proves the damage was in that specific room.
- Video Walkthrough: Take a 5-minute continuous video of the entire property while narrating what you see. “I am in the kitchen now; the oven door is slightly misaligned.”
The Signature and Digital Trail
Once you finish your checklist, both you and the landlord must sign and date it.
- Keep the Original: Never give the only copy to the landlord.
- Go Digital: Scan the signed document and your photos. Email them to the landlord. This creates a “timestamped digital trail” that cannot be easily disputed later.
For residents in Houston apartment communities managed by Hexa PM, this process is often integrated into their high-quality service model, where maintenance oversight and tenant retention are top priorities.
Common Pitfalls to Avoid During Move-In
Do not let common mistakes undermine your efforts. Avoid these pitfalls:
- Rushing the Process: Don’t let a landlord rush you. Take at least 45-60 minutes for a standard apartment.
- Assuming Small Things Don’t Matter: A small chip in the porcelain sink might seem minor now, but it could cost you $500 later if the landlord claims you caused it.
- Forgetting the “Smell Test”: Note any odors of smoke, pets, or mold. These are hard to document with photos but very expensive to remediate.
Conclusion
A thorough move-in inspection is the single most important task a renter can perform. It bridges the gap between a stressful move and a secure tenancy. By using a move in inspection checklist printable, you are taking a proactive step toward financial protection and peace of mind.
At Hexa Property Management, we believe in delivering more than just a place to stay, we deliver a “good lifestyle.” Our team, led by experts in the Houston apartment industry, focuses on creating living spaces where every resident feels valued and supported. Whether you are a landlord or a resident, discover how our expertise and care redefine property management. Visit us today to learn more.
Frequently Asked Questions About US Rental Inspections
1. How long do I have to return the checklist to my landlord?
While it varies by state (Texas, California, Florida, etc.), the standard is usually between 3 and 7 days. If you don’t return it within the window specified in your lease, you may be stuck accepting the property “as-is.”
2. What if the landlord refuses to sign the checklist?
If a landlord refuses to sign, send the completed document to them via Certified Mail with a Return Receipt Requested. This proves you provided the information to them. Also, send it via email to create a digital record.
3. Can I use this for the move-out inspection as well?
Absolutely. In fact, you should. Bringing your original move-in checklist to the move-out walkthrough is the ultimate way to show that no new damage occurred.
4. Is the landlord required to fix everything I find?
Not necessarily. The checklist is primarily for documentation. However, if you find things that are broken (appliances) or unsafe (mold, broken locks), most US laws require the landlord to make those specific repairs.